

The Kitchen
still a work in progress
|
|
|
|
|
|

 |
|
|---|---|
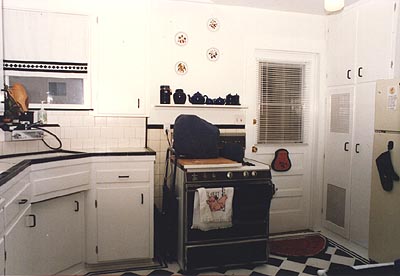
I've pushed the "island" out of the way for the pictures. Storage is a problem so I have two vintage buffets in the kitchen for extra storage. A small rustic one in the center as an island and a nice oak one on the wall. Movement is tight, but then I'm the only one that works in the kitchen and I'm used to it. |
|
The floor has been tiled half way up the walls as 'wainscoting'. Looks original doesn't it? The cupboard over the stove does have to be replaced as it's only laminated particleboard and looks just awful. If anyone knows someone that can make me a cabinet out of real wood that matches the rest of the kitchen please let me know. |
|
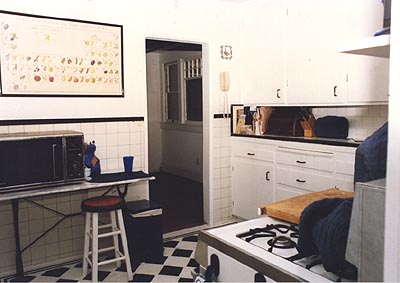
| As much as I'd like more storage, I like my periodic table of vegetables and my KitKat Klock more. I'll just have to make do with the two buffets. |
Back to the kitchen. Summer 2008.
 |
Here is the cabinet next to the stove. It's to the right of the sink. (see pictures above.) It's a small cabinet, only a little over 18 inches wide. The perfect location for a dishwasher. Only when I moved into the house 20 years ago they didn't make dishwashers that narrow. So I installed a "Dishmaster" faucet and have been washing my dishes by hand. But hand washing wastes a lot of water. A dishwasher supposedly uses 80% less water. So time to reduce my water use and install a dishwasher. And this is the only spot it can go. So I'll have to move my cooking utensils, pots and pans, vinegar, oil, salt, corningware bowls and my paper towel holder |
|---|---|
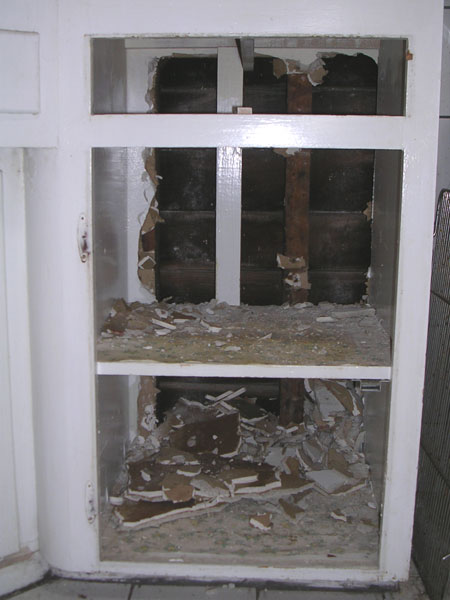 |
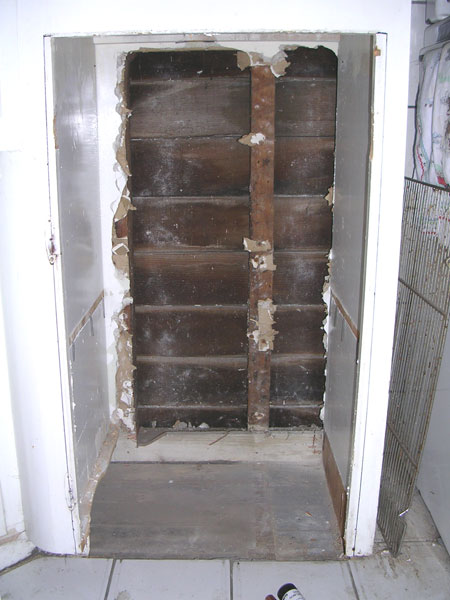
Demolition begins. I've removed the drawer and the door and taken a hammer to the back plaster. These cabinets were stick built on site. I hate to do anything to them as they are vintage and have great character. But every modern home is expected to have a dishwasher. I already have a microwave oven/hood combo over the stove. I also have a garbage disposal under the sink. A dishwasher is the last modern convenience this kitchen needs to compete in the 21st century. (I have a tankless water heater too, but that's another story.) Now the problem here is that the lower cabinets are only 18" deep. (The uppers are even shallower). An average dishwasher needs 22-24 inches in depth. So in order to install a dishwasher I'll have to go into the stud wall. And there are studs in the way. At first I thought none, then only one. Turns out there are two.
|
 |
No turning back now. I've taken a reciprocating saw to the shelf and frame and supports for the drawer and I've cut out the kickplate. Inside the "floor" is a full inch lower than the tiled floor in the kitchen. I'll be adding a piece of cement board and tiling the inside. I will NOT bring it up to the kitchen floor level as I need that little bit lower area. But the tile will allow the dishwasher to slide in easier. In the back there are two studs that will need to be removed. I'll be reframing with a header across to support the studs just like if I were putting in a window. There is a sill in the back that is higher than the floor. But I have a solution to that too. I'll remove the two back feet on the dishwasher and the back frame will sit on the sill instead of the feet. Tiling the inside will bring it up just enough. Then I'll level with the front feet only. I do need to cut the front frame just a little bit wider. But it's plenty tall enough. And I could cut it even taller if I needed to. My countertops are a few inches taller than normal because Mrs. Bishop was 6 ft tall. I'll be lining the back and sides with luan using construction adhesive and brad nails. I may install some insulation under the counter area to cut down on noise. I have a few inches there. |
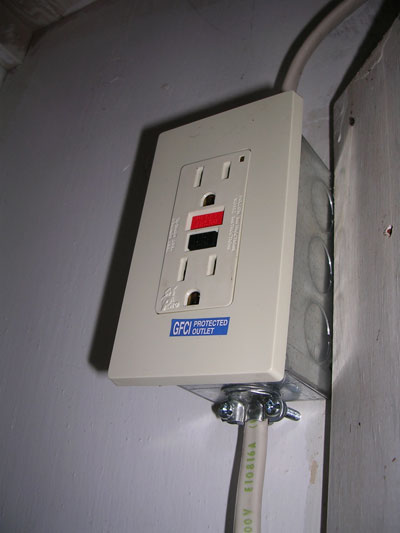
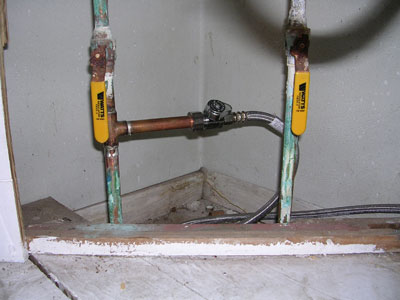
I've tapped into the hot water and installed a shut off. It is below the sink shutoff so I can shut off the sink and still run the dishwasher, or shut off the dishwasher and still run the sink. It may not have been the ideal place, but it was low enough so I didn't have to work behind the garbage disposal or take the disposal out. The hot water is hooked up and NOTHING LEAKS! We'll see if I can place the air trap without taking the disposal out. Or tap out the disposal plug without taking it out. To the right, I've installed a GFCI outlet for the dishwasher. I think this is best since it is under the sink. I opted NOT to hardwire the dishwasher. This means in the future a replacement can be installed much easier. Many installers will not hardwire. I've found my sabre saw. Now back to cabinet demolision. |
 |
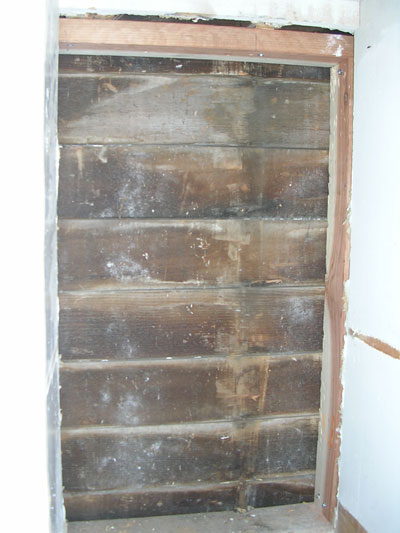
Old studs out. |
New studs in. (and header) Screws, not nails. |
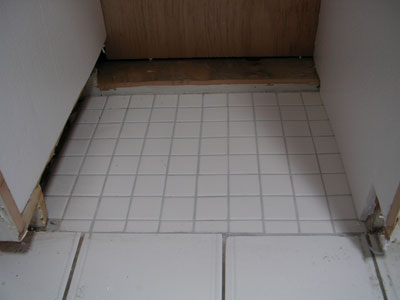
I've installed cement board and 2x2 white tiles to the floor to finish it off and to help the dishwasher slide better. I also needed to bring the floor up just a little so the back of the dishwasher can rest evenly on the back sill (that has been cut down). The back adjustable feet will be removed, leaving only the front feet. Turns out I had plenty of headroom. So much so that I put the back feet back on (the back still resting on that back sill) and then had to screw the front feet out quite a bit to level. I really didn't need the inside of the cabinet to be lower than the floor. Could have built it up and made it even. Well, too late now. |
 |
Here you can see the luan on the back, and the foam core insulation finishing off the sides and top. This should cut down on the sound significantly. I will also be putting some insulation in the front kick plates of the dishwasher. That is all dead space. |
 |
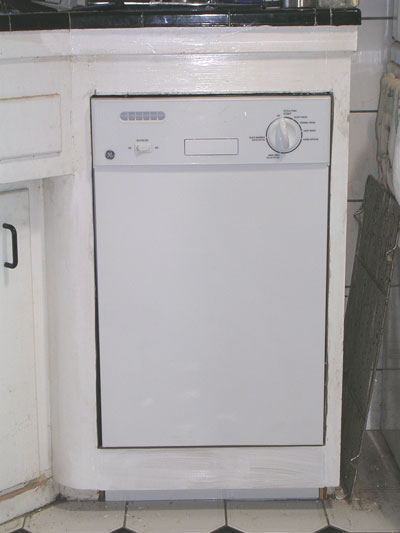
And here it is in place. It was a bit of a struggle. I had so much head room I put the back legs back in and screwed them out about three quarters of an inch. Then put the machine back and screwed out the front legs to level. The machine seems racked a little but then the entire thing seems a bit cheap to me. I had to buy a hose clamp and reattach the hose from the motor because that had come off in transit. The front frame where the toe kicks attach was bent too. Well, it's not like I spent a fortune on it. I've put two layers of half inch foam core insulation behind the toekick before screwing it in place. It's as quiet as it's ever going to be. Which is not bad at all. But if there is anything, and I mean anything wrong with this. GE is coming out to fix it. And if it needs replacing, they can do it. I'm not taking this thing out again until it's dead and has to be replaced. May it live long and prosper. The discharge hose from the air gap to the garbage disposal leaked, but ....the internet is your friend. My adapter from Aubuchon Hardware has arrived and we're high and dry. The opening around it is still a bit rough so I think I may buy some trim to pretty it up. I put a piece across the bottom under the door to make it look finished. It's only held in with caulk so it will be easy to remove if the dishwasher ever needs to be replaced. BTW this is a GE Spacesaver GSM1800NWW. It's 18 inches wide. And it runs quieter than my Mother's Kitchenaid. |
 |
Now it's on to repairing the shelves over the stove (that were built WRONG and out of crap pine instead of paint grade birch) and then painting the entire kitchen. I need to track down crown molding to match. And patch the ceiling where there used to be a vent. |
You can see why I'm doing the installation myself. No installer is going to go through what I'm going through. Most think they're just taking out an old dishwasher and hooking up a new one. Even directions on the internet are for replacing because it's assumed everyone has a dishwasher already. Pretty soon....me too. |
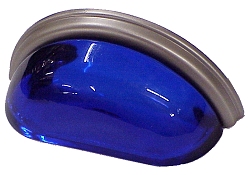
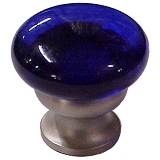
I've finished installing a shelf in the water heater cabinet to hold the displaced pots. They all fit. I used tongue and groove. Because the shelf was 36.75 inches wide, I had to buy four boards. But it's done. I cut out a hold for the flue, not too snug. And after the shelves above the stove are fixed and trimmed it will be time to paint. And I still need to reorganize the rest of the cabinets and put in new shelf paper. ($9.00 a roll?!) Then I'm changing out the cheap plastic door pulls I put in when I bought the house 20 years ago. Time to upgrade. And I decided to go with color. And it ain't cheap. But the internet is your friend. I found what I wanted at Home Depot Expo. Then I found it cheaper online. I've decided to go with what I love, bin pulls for the drawers and cobalt blue glass for all of them. If I get brave enough someday, maybe I'll saw my cabinet doors in half, buy more knobs and hinges and then have double doors. |
The bin pulls and knob I choose. Don't you love them? They're from Lewis Dolan Inc. And they come in various colors and finishes. I got mine on sale at Antique Hardware. |


Sewing
Room |
|||
|---|---|---|---|
| Photovoltaic Panels | |||
| Tankless Water Heater |